Home | Aviation | Snowboarding |
Music | Mountain Biking | Hiking | Work | Radio site | W6KCS Repeater
Misc.pictures | Message Forum | Email Steve
Steve's Cessna 140 Lower Doorpost
Cracks :-(
I was down at Rick's hangar one day checking out his project, and he had this hangdog look on his face. He had just found that he had cracks in the bottoms of both doorposts in his 140 fuselage, which was already apart for gear box repairs. This was only going to add to the work he had to do to get it flying. I think he was already sorry that he sold me his previous airplane (the yellow one), and I'm sure this latest discovery only made him regret it more.
As we talked, I wondered out loud, half-joking, if I might have the same cracks in my airplane, since they're very common to 140's. We decided to go down to my hangar and see Rick grabbed his magnifying glass and we went down to check. Sure enough, I looked and found that I had the same cracks, on both sides! As I announced this fact, I'm pretty sure that I detected a slight smile on Rick's face.
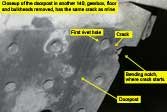
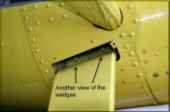
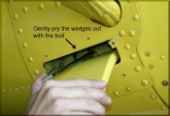
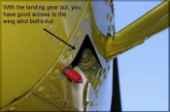
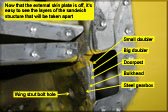
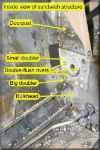
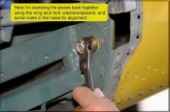
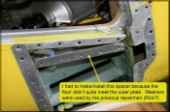
These cracks are a common problem with Cessna 140's, but they seem to be ignored by most owners. It's hard to blame them, considering what a pain it is to do the repairs. The cracks start in a bending notch in the doorpost, below the floorboard, just above the area where the wing strut attaches, and travel about a half-inch until they reach a rivet hole (the "first rivet hole"). Most of the time they stop at this hole, but in a couple of cases I've seen, they continued through this hole on the way to the next, which is most of the way across the structure. Since the crack is in a part of the doorpost that is "sandwiched" in among four other layers of structure, there is no way to see if the crack has progressed beyond the first hole.
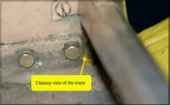
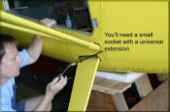
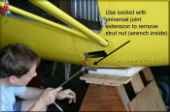
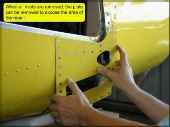
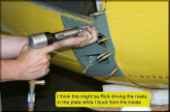
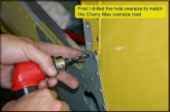
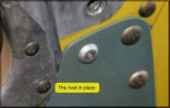
Although there is no Airworthiness Directive on this problem, and there seems to be no known case of any airframe failures resulting from this crack, I decided to go ahead and do the "official" repair using Cessna service kit SK150-53. This kit contains a drawing and a small piece of aluminum, a replacement for what I call the "big doubler" that extends a couple of inches above the cracked area where it is riveted to the doorpost. This area is a real pain to repair because it involves double-flush (flush on both sides) number 6 AD rivets.
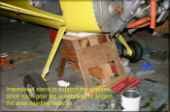
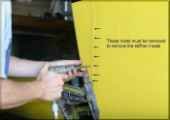
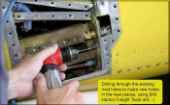
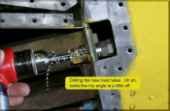
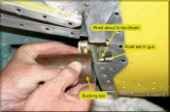
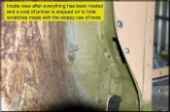
Below are some pictures taken during the repair of my airplane. They are a documentation of my own repairs so others can see what was involved. Please check with your mechanic and/or IA before doing anything based on what I have shown here. I am doing this work under the supervision of an experienced A&P/IA, and other experienced individuals, but I am by no means an expert and this page should not be construed as a "how-to" on doing the Cessna 140 lower doorpost crack repair. It's for information only.
Click on the thumbnails below for larger images, or view as a slideshow by clicking the first picture, then using "Next" and "Previous" links at the top of the page to move around.
Web page and images generated using
SuperJPG
8/28/2004 21:23